The Best Fluffy Pancakes recipe you will fall in love with. Full of tips and tricks to help you make the best pancakes.

Table of Contents
Air Fryer Tilapia is one of those fish that people want to love but often struggle with at home. It cooks quickly, has a mild flavor, and fits easily into weeknight cooking, yet it can just as easily turn dry, rubbery, or bland if handled carelessly. This air fryer tilapia recipe exists for one clear reason: to remove that uncertainty. I’ve made tilapia every possible way over the years, and the air fryer is the method I rely on most when I want consistent results without babysitting the stove.
The air fryer works especially well here because it applies steady heat and airflow without aggressive moisture loss. When paired with the right seasoning approach and timing, tilapia stays tender inside while developing a light, savory exterior. This recipe is built around those principles, not shortcuts. Everything you’ll read below explains not just what to do, but why it works, so you can repeat it confidently or adapt it to your own kitchen habits.
Why the Air Fryer Is Ideal for Tilapia Fillets
Air Fryer Tilapia is lean and delicate, which means it doesn’t forgive overcooking. Traditional methods like pan-frying demand constant attention, while baking can easily dry the fish out before it develops flavor. The air fryer solves both problems by cooking quickly and evenly while maintaining surface moisture.
Because hot air circulates around the fillet, the fish cooks from all sides without needing excess oil. This circulation helps set the exterior gently while allowing the interior to steam slightly, which is exactly what a mild white fish needs. Another advantage is predictability. Once you understand the timing window for your air fryer, the results are repeatable, which is essential for weeknight cooking.
This air fryer tilapia recipe also adapts well to different seasoning styles, making it easy to keep in rotation without feeling repetitive.
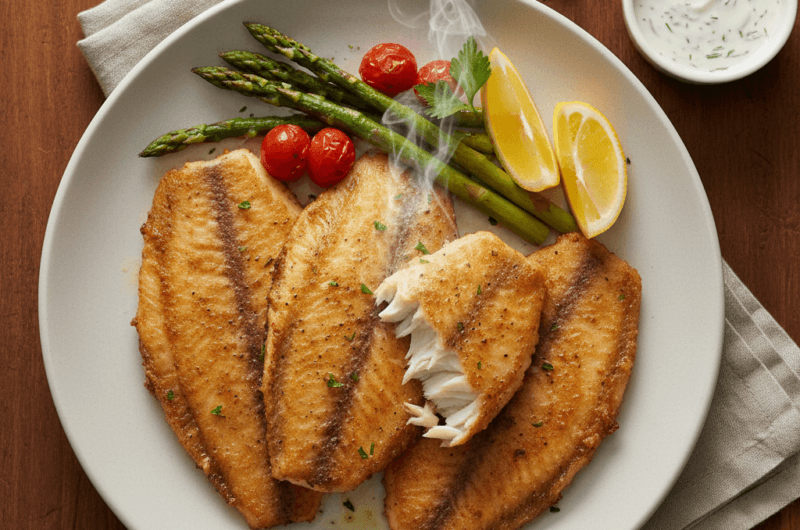
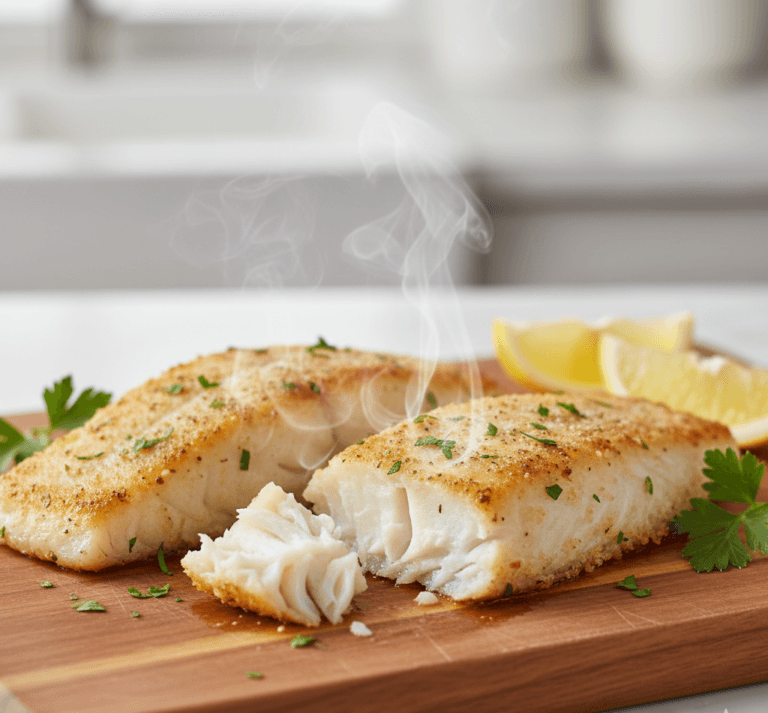
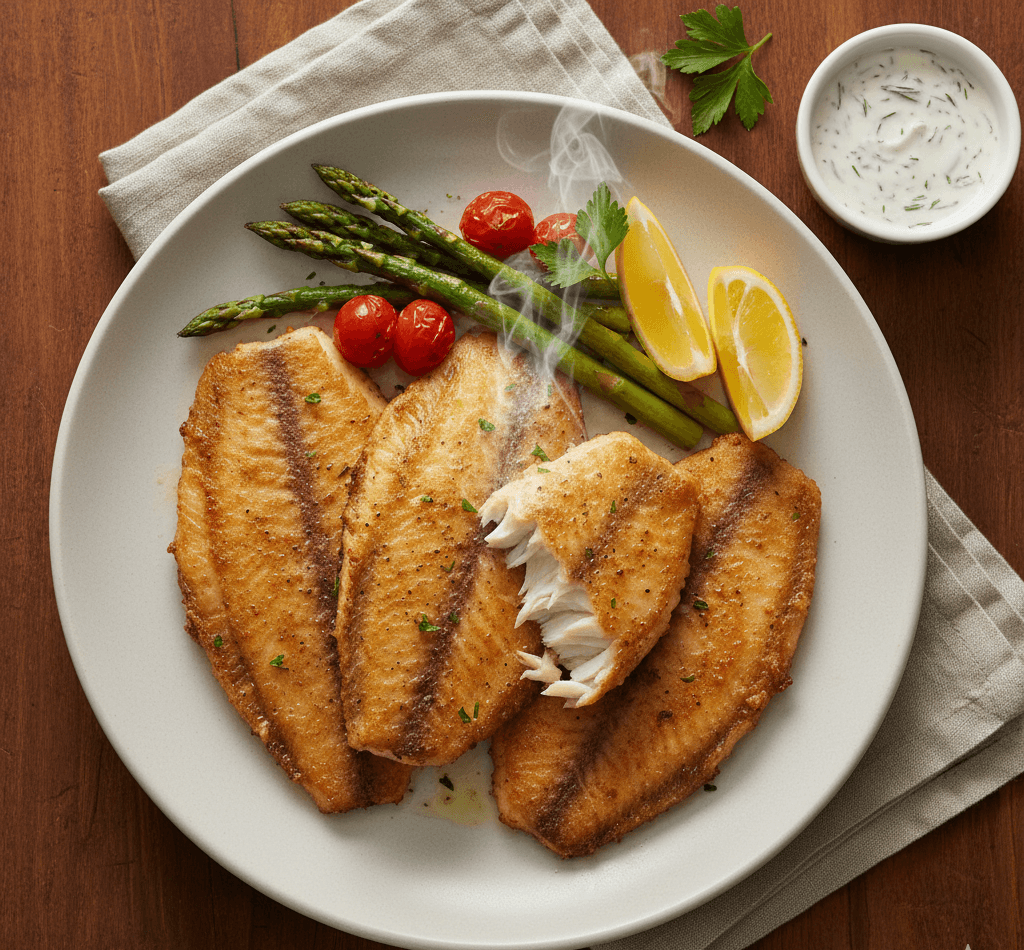
Air Fryer Tilapia That Turns Out Moist, Flaky, and Reliable Every Time
Course: MainCuisine: InternationalDifficulty: EasyServings
2
servingsPrep time
5
minutesCooking time
10
minutesTotal time
15
minutesThis air fryer tilapia recipe produces moist, flaky fish with clean seasoning and no dryness. It’s fast, reliable, and ideal for weeknight meals when you want simple results that still taste intentional.
Ingredients
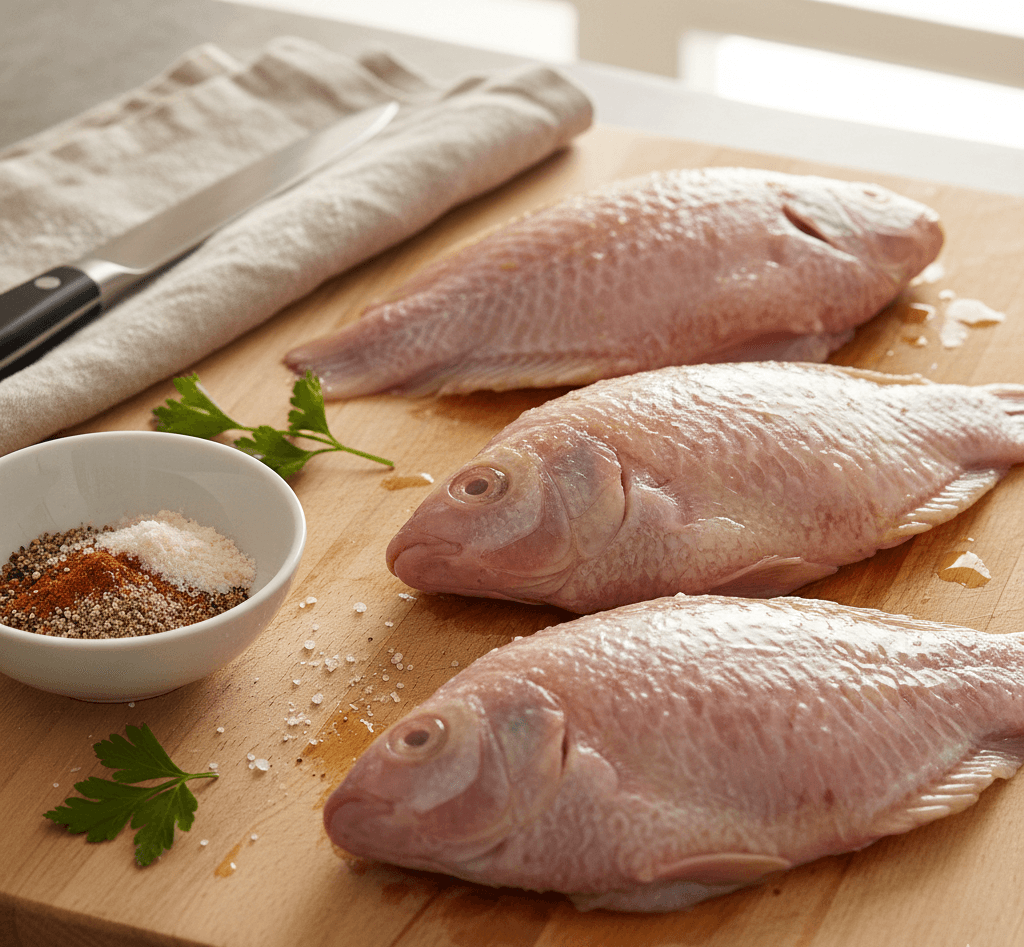
Tilapia fillets, fully thawed and patted dry – 2
Olive oil – 1 tablespoon
Salt – to taste
Garlic powder – ½ teaspoon
Paprika – ½ teaspoon
Black pepper – ¼ teaspoon
- Optional Helpful Add-Ins
Lemon zest – ½ teaspoon
Dried herbs such as parsley or thyme – ¼ teaspoon
Directions
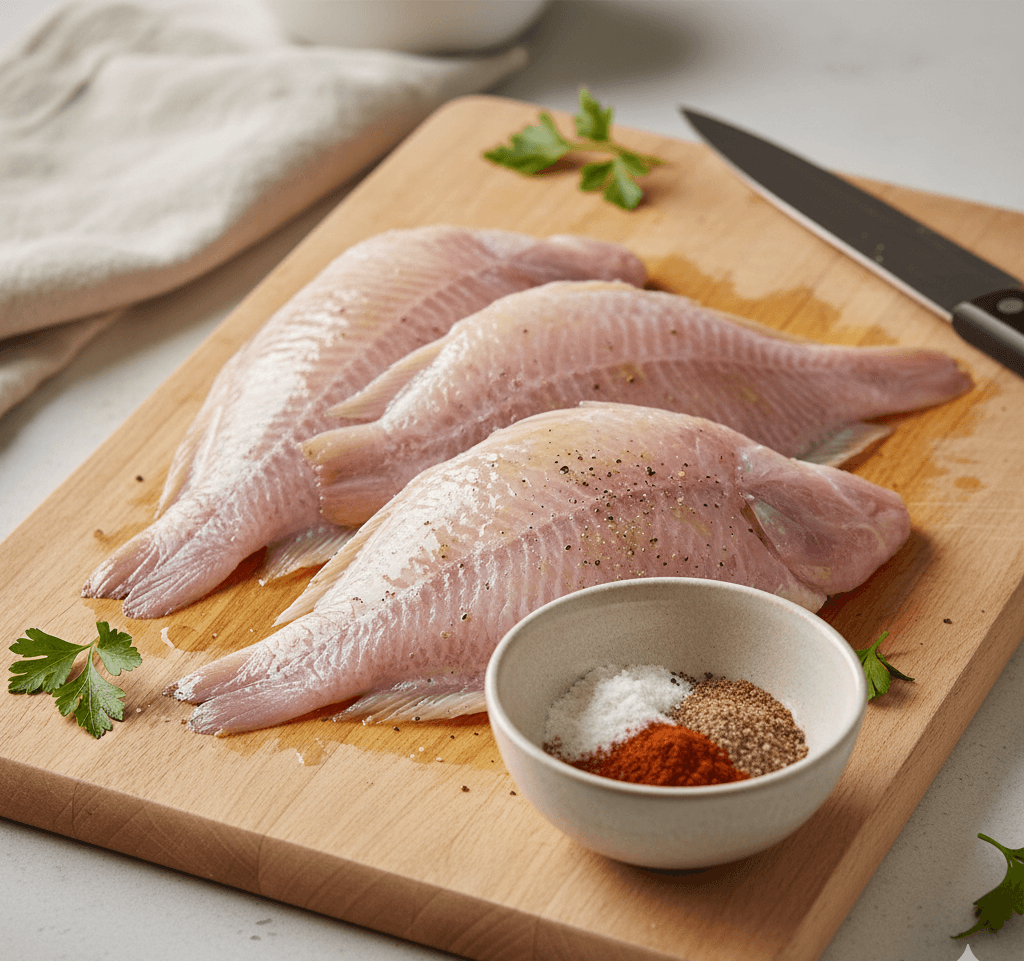
- Preparing the Fillets Properly
Start by patting the tilapia fillets dry with paper towels. This step matters more than most people realize. Removing surface moisture allows the seasoning to stick and prevents steaming, which can leave the fish pale and soft. Once dry, lightly brush both sides with olive oil. The oil acts as a flavor carrier and helps regulate surface heat. - Season the fillets evenly on both sides. Avoid pressing the seasoning into the fish aggressively; a light, even coating is enough. Over-handling at this stage can break the delicate flesh.
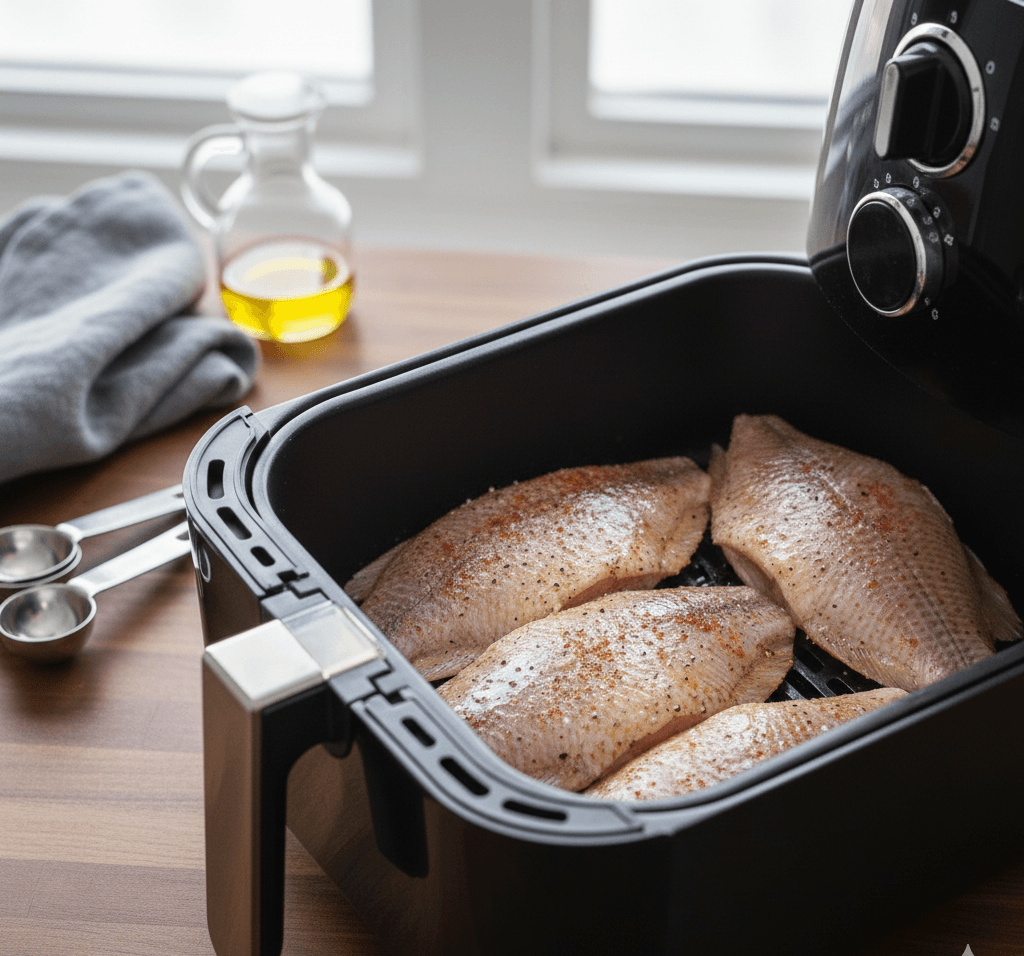
- Setting Up the Air Fryer
Preheat the air fryer to 380°F if your model requires it. Preheating ensures that the fish begins cooking immediately, reducing the time it spends drying out. Arrange the fillets in a single layer in the basket, leaving space between them. Crowding traps moisture and disrupts airflow, which directly affects texture - Cooking With Visual Cues in Mind
Cook the tilapia for 8 to 10 minutes, depending on thickness. There’s no need to flip if your air fryer circulates air evenly, but you can turn the fillets gently halfway through if your model has hot spots. The fish is done when it flakes easily with a fork and turns opaque throughout. The edges may show light browning, but the surface should never look dry or cracked. - Resting Before Serving
Once cooked, remove the fillets and let them rest for one to two minutes. This brief rest allows internal moisture to redistribute, which improves texture. Finish with lemon zest or fresh herbs if desired.
Notes
- Drying the fish thoroughly before seasoning solves most texture problems and improves flavor absorption. Timing matters more than temperature precision here, so watch the fish closely during the last few minutes of cooking. Tilapia continues cooking briefly after removal, which is why resting is important.
- Temperature fluctuations between air fryer models can affect results slightly, so adjust timing based on thickness rather than relying strictly on minutes. Texture changes are subtle with tilapia, and learning those cues makes a noticeable difference.
- First-time cooks should focus on simplicity. Resist the urge to add too many spices or sauces until you’re comfortable with the base method. Once you understand how the fish behaves, variations become easier and more successful.
Understanding Tilapia Before You Cook It
Air Fryer Tilapia’s mildness is both its strength and its weakness. It absorbs flavor easily, but it also needs help to taste like more than just fish. The texture is naturally soft, which means aggressive marinades or overly wet coatings can actually work against you by making the flesh mushy.
Fresh tilapia should smell clean and neutral, never fishy. Frozen fillets are perfectly acceptable and often more consistent, but they must be fully thawed and dried before cooking. Excess surface moisture is one of the main reasons tilapia fails in the air fryer. Water interferes with seasoning adhesion and prevents proper surface cooking.
Thickness matters more than weight here. Thin fillets cook faster and require careful timing, while thicker fillets offer a slightly wider margin for error. This recipe is written to accommodate both, with visual doneness cues explained later.
Choosing Seasonings That Complement, Not Overpower
Tilapia benefits from seasoning that adds depth without masking its natural flavor. Salt is essential, but it must be applied thoughtfully. Salting too early can pull moisture out of the fish, while salting too late leaves the interior under-seasoned. In this recipe, seasoning is applied just before cooking to balance flavor and texture.
Dry spices perform better than wet marinades in the air fryer. Paprika, garlic powder, onion powder, and a small amount of black pepper create a savory base that browns gently without burning. A touch of oil helps the seasoning adhere and supports even cooking, but more is not better here. Too much oil can cause sogginess rather than crispness.
If you enjoy citrus, it’s best added after cooking. Lemon juice before air frying can interfere with texture and create uneven cooking.
How to Tell When Tilapia Is Perfectly Cooked
Tilapia doesn’t need guesswork if you know what to look for. Properly cooked fillets will appear opaque and slightly glossy, not chalky. When pressed gently with a fork, the flesh should separate into flakes without resistance. If the fish feels firm or springy, it’s likely overcooked.
Temperature-wise, tilapia is done at 145°F internally, but visual cues are often more reliable in an air fryer setting. Trust your eyes and fork more than the clock.
Common Air Fryer Tilapia Mistakes to Avoid
One common issue is skipping the drying step. Moisture on the surface creates steam, which prevents browning and dilutes seasoning. Another mistake is cooking at too high a temperature. While it’s tempting to speed things up, excessive heat causes the thin edges to overcook before the center is ready.
Using heavy breading is another frequent misstep. Breaded tilapia can work in an air fryer, but it requires a different approach. This recipe focuses on clean, seasoned fillets for reliability and consistency.
Practical Serving Uses for This Recipe
This air fryer tilapia recipe works well as a standalone protein, but it also integrates easily into other meals. Serve it alongside roasted vegetables for a balanced dinner, or flake it into tacos with fresh slaw and a light sauce. It pairs well with rice, quinoa, or simple salads.
For related ideas, this pairs naturally with simple air fryer vegetables or quick grain bowls, making it easy to build a complete meal without extra cooking methods.
Storage and Reheating Without Drying It Out
Tilapia is best eaten fresh, but leftovers can still be enjoyable if handled properly. Store cooked fillets in an airtight container in the refrigerator for up to two days. To reheat, use the air fryer at a lower temperature, around 320°F, for just a few minutes. This gentle reheating helps preserve moisture.
Avoid microwaving if possible, as it tends to toughen the fish and create uneven texture.
Frequently Asked Questions
Can I use frozen tilapia directly in the air fryer?
Tilapia should be fully thawed before cooking for best texture. Cooking from frozen often leads to uneven doneness and excess moisture.
What temperature is best for air fryer tilapia?
A temperature around 380°F balances speed and moisture retention without drying the fish out.
How do I keep tilapia from sticking to the basket?
Lightly oiling the fish and ensuring the basket is clean prevents sticking more effectively than excess oil spray.
Can I add breadcrumbs to this recipe?
Breadcrumbs require additional oil and timing adjustments. This recipe is designed for seasoned fillets rather than breaded ones.